
Mito Hollyhock vs Urawa Prediction & Match Analysis: Can Reds Plug Away Transition Flaws? — Scoreline Preview
- ▸Primary Thesis: Mito Hollyhock capitalize on Urawa's away defensive leaks in transition to secure a home triumph (Confidence: Moderate, Value: High)
- ▸Secondary Angle: Structured possession and individual pedigree allow Urawa to stabilize tempo and salvage a tight stalemate (Confidence: Moderate, Value: Moderate)
- ▸Contingency Angle: An early deadlock forces a low-margin attritional contest contained within Under 2.5 goals (Confidence: Low, Value: Moderate)
Mito Hollyhock's sharp home transition threat exploits Urawa's defensive fragility on the road, anchoring a high-value Home Win / Draw projection led by a 2:1 scoreline.
Matchup Intelligence & Head-to-Head
Season Benchmarks & Historical BattlesMito Hollyhock Attack vs Defence Comparison Urawa
Recent Head-to-Head Meetings
No recent head-to-head records found in archive.
As the J1 League campaign enters Regular Season Round 10, Mito Hollyhock prepare to host traditional powerhouse Urawa Red Diamonds at K's denki Stadium Mito in a compelling regional clash. At the heart of this contest lies whether Mito's high-tempo vertical transitions can capitalize on Urawa's alarming defensive vulnerability away from home, or if the visitors' technical superiority in central midfield will finally impose game control. While public sentiment instinctively defers to Urawa's illustrious pedigree, rigorous quantitative indicators reveal a severe performance disconnect on the road, where the Reds have surrendered an alarming 3.0 goals per fixture. Harnessing a hybrid methodology that synthesizes Poisson goal-expectancy distributions, tactical game states, and verified team news, XG Mind AI deconstructs this encounter to expose the underlying probabilities, project decisive scorelines, and uncover sharp contrarian value.
📌 Mito Hollyhock vs Urawa: Match Intelligence Brief
- Fixture ID: 1556096
- Matchup: Mito Hollyhock vs Urawa
- Competition: J1 League, Regular Season - Round 10
- Kickoff Time: 2026-10-17 07:00 UTC
- Key Tactical Watchpoint: Mito's rapid vertical breaks targeting the vacated space behind Urawa's overcommitted full-backs during defensive transition.
📊 1. Mito Hollyhock Attacking Structure vs Urawa Defensive Counter
⚔️ Head-to-Head History: Sparse Top-Flight Meetings Following Mito's Historic Promotion
| Date | Competition | Home Team | Score (HT) | Away Team |
| 2026-05-09 | J1 League | Urawa | 4:1 (2:0) | Mito Hollyhock |
| 2025-08-15 | Club Friendly | Mito Hollyhock | 1:2 (0:1) | Urawa |
| 2023-04-19 | J-League Cup | Urawa | 2:1 (1:1) | Mito Hollyhock |
Because Mito Hollyhock spent the majority of their modern history competing in the second tier before capturing the 2025 J2 League championship to earn top-flight promotion, historical competitive meetings between these two clubs remain limited. In their earlier meeting this season at Saitama Stadium, Urawa capitalized on early territorial dominance to secure a 4:1 victory. However, with the venue shifting to Ibaraki Prefecture, Mito's domestic setup presents a distinctly different tactical dynamic.
📈 Team Form & Tactical Style Breakdown: Direct Transition Press vs Structured Possession
Home Team (Mito Hollyhock): Under manager Daisuke Kimori, Mito Hollyhock have embraced an aggressive, high-energy 4-4-2 shape designed to minimize defensive exposure through compact lines and sudden vertical exploitation. Across their recent competitive fixtures, Mito have demonstrated commendable home resilience, highlighted by a disciplined 1:0 victory over FC Tokyo in the J-League Cup and an emphatic 7:0 cup triumph against Fukushima United, counterbalanced by narrow league defeats including a 1:2 reverse against Shimizu S-Pulse and a 0:1 loss to Kawasaki Frontale. Operating with an average of 45.0% possession, Mito do not prioritize sterile midfield circulation; instead, they generate 1.3 goals per match from 9.9 cumulative expected goals by relying on the direct channel running of striker Arata Watanabe and the energetic second-ball retrieval of midfielders Yu Funabashi and Yuto Yamashita. Defensive coordination anchored by centre-back Rei Ieizumi and goalkeeper Konosuke Nishikawa has kept their concession rate at 1.4 goals per match. Mito Hollyhock's primary tactical avenue centers on aggressive mid-block triggers that instantly isolate opposing central defenders in space. While their offensive output occasionally suffers from finishing variance, their structural discipline at K's denki Stadium Mito consistently disrupts rhythm-based passing sides.
Away Team (Urawa): Urawa Red Diamonds arrive under the stewardship of Cho Kwi-jae seeking to reconcile their heavyweight reputation with acute tactical vulnerabilities on the road. While Urawa displayed offensive swagger in a recent 4:0 away victory over Yokohama FC in the J-League Cup and a 3:1 league win against Tokyo Verdy, their regular season away form in J1 has been profoundly destabilized, underscored by a sobering 0:3 defeat at FC Tokyo and a 1:2 home stumble against Fagiano Okayama. Operating with an atypical 33.4% average possession in challenging road fixtures, Urawa have struggled to establish their customary positional hegemony, yielding a meager 0.7 goals per match while conceding a staggering 3.0 goals per away encounter from 5.2 expected goals against. Swedish midfield orchestrator Samuel Gustafson provides exceptional passing vision alongside dynamic winger Takuro Kaneko and experienced full-back Miki Yamane, yet the side frequently gets caught in unbalanced transition phases. Urawa's persistent inability to defend wide counter-attacks when their full-backs push high leaves veteran goalkeeper Shusaku Nishikawa repeatedly exposed to high-probability breakaways. Unless Cho Kwi-jae introduces greater defensive caution in central midfield, Urawa remain acutely vulnerable to fast-breaking hosts.
🔍 Core Statistical Comparison: Divergent Home Efficiency vs Road Defensive Leaks
| Metric | Mito Hollyhock (Season) | Urawa (Season) |
| Expected Goals (xG / match) | 1.10 | 0.77 |
| Expected Goals Against (xGA / match) | 1.51 | 1.73 |
| Average Possession (%) | 45.0% | 33.4% |
| Shots / match | 11.2 | 8.8 |
| Shots on Target / match | 3.8 | 2.6 |
| Corners Won / match | 4.7 | 4.2 |
⚠️ Key Absences & Squad Impact Assessment: Both Squads Fully Available with Clean Disciplinary Records
Both managers enter this Round 10 fixture with virtually full-strength rosters at their disposal. The official medical and disciplinary feeds confirm zero suspensions or newly reported structural injuries for either side. Mito Hollyhock have key central figures Arata Watanabe, Kenta Itakura, and goalkeeper Konosuke Nishikawa available for selection, ensuring Daisuke Kimori can field his first-choice transition XI. Similarly, Urawa manager Cho Kwi-jae has full access to playmakers Samuel Gustafson, Tatsuki Seko, Takuro Kaneko, and defender Miki Yamane. The absence of injury constraints means this matchup will be determined strictly by tactical execution, pressing structures, and game-state management.
⚖️ Referee & Officiating Analysis: Masuya Ueda Disciplined Approach
- Match Official: Masuya Ueda
- Officiating Tendency: Ueda is recognized across Japanese professional football for an unobtrusive officiating philosophy. He averages a modest 2.71 yellow cards and 0.18 red cards per match, maintaining a relatively high foul tolerance threshold before reaching for his pocket.
- Tactical Repercussions: Ueda's reluctance to whistle soft contact strongly favors Mito Hollyhock's physical, high-contact pressing in the middle third. By allowing contested shoulder challenges and transitional tackles to flow, the official diminishes Urawa's ability to buy cheap fouls that break up defensive pressure, substantially elevating the likelihood of live-ball turnovers.
🤔 2. Can Urawa Disrupt Mito Hollyhock? Dual Perspective
🟢 Arguments Supporting Mito Hollyhock
- Lethal Transition Exploitation Against High Defensive Lines: Urawa have conceded an alarming 3.0 goals per away match in the league, displaying recurring organizational breakdowns whenever possession is surrendered in advanced areas. Mito striker Arata Watanabe and winger Keisuke Tada possess the acceleration required to punish Urawa's slow recovery pace.
- Home Ground Resilience at K's denki Stadium Mito: Mito have demonstrated the tactical poise required to overcome top-tier opposition on home turf, evidenced by their 1:0 cup victory over FC Tokyo. Their comfortable 45.0% possession style allows them to absorb pressure without conceding territorial collapse.
- Tactical Continuity Under Daisuke Kimori: While Urawa continue to adjust to tactical tweaks under Cho Kwi-jae, Mito's compact 4-4-2 structure is thoroughly drilled. The midfield double-pivot of Yu Funabashi and Yuto Yamashita excels at clogging central passing lanes into Gustafson.
🔴 Arguments Opposing Mito Hollyhock / Supporting Urawa
- Individual Class and Creative Superiority: Despite collective away struggles, Urawa boast superior individual pedigree. Samuel Gustafson's line-breaking distribution and Takuro Kaneko's 1v1 dribbling ability can bypass Mito's pressing traps with single moments of technical quality.
- Cho Kwi-jae's Tactical Rebound Urgency: Coming off an embarrassing 0:3 defeat at FC Tokyo, Urawa face immense internal urgency to protect their top-flight standing. A more conservative tactical approach emphasizing counter-pressing security could stifle Mito's breakaways.
- Set-Piece Delivery and Flank Delivery Threat: With Miki Yamane providing dangerous crossing angles from the right flank, Urawa can test Mito's defensive aerial organization, which has conceded 1.4 goals per match over the season.
Contextual & Motivational Risk Assessment
Mito Hollyhock enter this matchday positioned 13th in the J1 standings, keenly aware that collecting points at home against mid-table rivals is fundamental to securing top-flight survival following last season's promotion. Conversely, Urawa sit 11th with 12 points, experiencing significant supporter scrutiny regarding their inconsistent league trajectory. While Urawa enjoyed a morale-boosting 4:0 Levain Cup win at Yokohama FC in midweek, potential fatigue among their core senior players contrasts with Mito's concentrated focus on league stability. Complacency or tactical impatience from Urawa represents a profound tactical risk.
🧠 3. Empirical Expectancies: Poisson Matrix & Sharp Consensus
- Analytical Modeling Deployed: Independent Poisson Expected-Goal Matrix + Liquidity Consensus Tracking.
- Model Quantitative Insights: Derived from supplied per-match scoring and concession averages, the baseline distribution calculates a home scoring expectancy (lambda_home) of 2.15 and an away scoring expectancy (lambda_away) of 1.05, yielding an expansive total expectancy of 3.20. In unadjusted Poisson density simulations, Mito Hollyhock hold a 62.5% home win probability, with a 20.0% draw density and a 17.5% away win probability. The probability of both teams scoring stands at 57.4%, while total goal densities peak at 3 goals (22.3%) and 2 goals (20.9%).
- Market Sentiment & Professional Consensus: Public retail perception remains heavily biased toward Urawa Red Diamonds due to historical stature, with global market consensus pricing an away victory in the 45.0% range. However, analytical tracking detects significant structural resistance: sharp quantitative models heavily downgrade Urawa's true road win probability due to their severe concession rate, opening an actionable expectation gap favoring the home side.
- Dynamic Line & Price Movement: Opening numbers reflected conventional brand-name favoritism toward Urawa, but late liquidity adjustments have shown quiet backing for home resistance and goals, aligning with the model's Over 2.5 orientation and elevated home goal expectancy.
🎯 4. The Decisive Take: Mito Hollyhock vs Urawa Tactical Outcome
Final Strategic Synthesis
When synthesizing underlying chance metrics against tactical matchups, this fixture presents a stark collision between historical reputation and empirical reality. Mito Hollyhock's direct verticality is systematically engineered to exploit sides that overcommit numbers forward without disciplined rest defense. Urawa's road record of conceding 3.0 goals per match is not an anomaly; it is the structural byproduct of expansive full-back positioning leaving wide channels vulnerable to rapid counters. While Urawa possess sufficient individual quality through Samuel Gustafson and Takuro Kaneko to score, their structural porosity tilts the primary advantage toward the hosts. Combining Mito's offensive transition threat with Urawa's ability to mount periods of sustained pressure, a high-value Home Win / Draw stance represents the optimal risk-adjusted viewpoint.
- ⭐⭐ AI Confidence Rating: Value Upset
🔑 4.1 Core Analytical Viewpoints
Strategic Opening Context:
Following comprehensive synthesis across quantitative models and tactical intelligence, MatchMind AI identifies the core thesis below as the most balanced probabilistic trajectory for this encounter. All projections represent statistical estimates for research purposes, and readers are encouraged to evaluate tactical context independently.
- Primary Thesis (Core): Home Win / Draw — Mito Hollyhock capitalize on Urawa's porous away transition defense (3.0 goals conceded per match) to secure victory, while retaining coverage for a technical stalemate if Urawa's midfield imposes tempo control. (Confidence: Moderate, Value Index: High)
- Secondary Angle (Value): Over 2.5 Goals — Driven by a combined lambda of 3.20 and defensive fragility on both sides, the matchup carries an elevated 62.1% probability of breaching the 2.5-goal threshold. (Confidence: Moderate, Value Index: High)
- Contingency Angle (Hedge / Upset): 1:1 Scoreline Attrition — If Urawa adopt a disciplined, risk-averse low block to halt away transition bleeding, the match contracts into a competitive deadlock. (Confidence: Low, Value Index: Moderate)
Strategic Summary: The primary thesis exploits the immense disconnect between public brand bias toward Urawa and their catastrophic road defensive performance, securing high expected value across the two most probable match branches.
Core Recommendation: Back Mito Hollyhock to maintain home superiority via Home Win / Draw, anchored by a high-tempo 2:1 primary outcome.
🔥 4.2 Total Goals & Over/Under 2.5 Projection
1️⃣ Primary Goal Count: 3 Goals (Model Probability: 22.3%)
- Tactical Deduction: A three-goal outcome represents the exact convergence of Mito's home scoring average (1.3 goals per game) and Urawa's porous road defense (conceding 3.0 goals per away match). Mito's rapid vertical transitions orchestrated by Arata Watanabe will generate multiple high-probability chances against Urawa's retreating defensive pairing. Concurrently, Urawa's individual technical quality through Samuel Gustafson ensures the visitors will carve out opportunities against Mito's 1.4 concession average. A dynamic 2:1 game state perfectly fulfills this high-density tactical projection.
2️⃣ Secondary Goal Count: 2 Goals (Model Probability: 20.9%)
- Tactical Deduction: Should Cho Kwi-jae instruct his full-backs to prioritize defensive positioning over reckless overlaps, Urawa can suppress Mito's counter-attacking space. Under this controlled game state, scoring reduces to isolated breakthrough moments, yielding either a competitive 1:1 stalemate or a clinical 2:0 home clean sheet.
3️⃣ Over / Under 2.5 Quantitative Deduction: Over 2.5 (Model/Market Supported)
- Tactical & Liquidity Rationale: The analytical baseline establishes a combined goal expectancy of 3.20 (lambda_home 2.15 + lambda_away 1.05), which translates into a formidable 62.1% cumulative probability of three or more goals occurring. Urawa's severe defensive transition issues away from home guarantee high-quality open-play box entries for the hosts. With both sides demonstrating defensive concession averages exceeding 1.4 goals per match and referee Masuya Ueda allowing physical transition play, match conditions strongly favor a high-tempo contest exceeding the 2.5 total.
🥅 4.3 Final Scoreline Probability Matrix
1️⃣ Primary Projected Scoreline: 2:1 (Model Density: 9.9%)
- Matrix Reasoning: This exact scoreline stands as the modal intersection of Mito's transition potency and Urawa's chronic road vulnerabilities. Mito are projected to strike through sudden counter-attacks behind Urawa's advancing full-backs, establishing an advantage. While Urawa possess the midfield ingenuity to respond through Gustafson's distribution or Kaneko's flank penetration, their inability to sustain 90 minutes of defensive concentration away from home will allow Mito to find a decisive second-half winner.
2️⃣ Secondary Projected Scoreline: 1:1 (Model Density: 9.2%)
- Matrix Reasoning: In the secondary tactical branch, Urawa successfully absorb lessons from their recent 0:3 defeat at FC Tokyo, deploying a more measured mid-block that limits Mito's vertical runways. While Mito still breach the defense via a set-piece or counter-press turnover, Urawa's technical pedigree allows them to craft an equalizer, settling the contest in an honorable sharing of points.
⏳ 4.4 Half-Time / Full-Time Trend Probabilities
1️⃣ Primary Trend: Draw-Win (Model Probability: 28.5%)
- Script Reasoning: The opening 45 minutes are anticipated to feature tight tactical reconnaissance, with Urawa attempting to control possession while Mito maintain a disciplined mid-block, leading to a level scoreline at the interval. As physical fatigue impacts Urawa's transition tracking after the hour mark, Daisuke Kimori's aggressive counter-attacking substitutions will unlock the contest, allowing Mito to secure the victory in the second half.
2️⃣ Secondary Trend: Draw-Draw (Model Probability: 19.8%)
- Script Reasoning: In a more attritional contest, both defensive units cancel each other out across both halves. A first-half stalemate carries over into the second period, where conservative managerial adjustments ensure neither team commits sufficient numbers forward to break the deadlock.
⏳ 4.5 Match Progression & Live Tactical Scripts
- Attacking & Defensive Tempo Fingerprint:
- Mito Hollyhock Attacking Profile: Type B (Late Accelerators) — Mito typically absorb initial territorial pressure before increasing transition velocity between the 55th and 80th minutes.
- Urawa Defensive Vulnerability: Type E (Mid-Match Vulnerability) — Urawa consistently suffer concentration lapses and defensive decoupling during the transition from the first half into the second half.
Part 1: Base Case Match Flow (Standard Trajectory)
- 0–30 Minutes: Urawa attempt to establish rhythm through Samuel Gustafson, circulating possession across the backline. Mito maintain a disciplined mid-block 4-4-2, absorbing pressure and testing Urawa's high defensive line with direct balls toward Arata Watanabe.
- 30–60 Minutes: The game opens up as Urawa push full-backs Miki Yamane forward. Mito initiate aggressive counter-pressing traps, generating dangerous transition chances immediately before and after the halftime whistle.
- 60–90 Minutes: Physical drop-off becomes evident in Urawa's defensive midfield recovery. Mito introduce energetic wide substitutes, exploiting open space to claim decisive goals, while Urawa push numbers forward in a frantic late pursuit.
- Baseline Projections:
- Goal Expectancy Flow: Approximately 65% of total goal expectancy is concentrated in the second half.
- Corner Trajectory: Steady accumulation across both halves, settling near 8 to 10 total corners.
Part 2: Tactical Contingency Plans (Strategic Deviations)
- Contingency Scenario 1: Frustrated Favorite
- Trigger Condition: Urawa monopolize 65%+ possession but remain scoreless past the 65th minute.
- Tactical Deviation: Urawa overcommit central midfielders into the penalty area, leaving enormous open space for Mito to launch 3v2 counter-attacks.
- Corner Volume Alert: Elevated (>10.5 corners as Urawa repeatedly cross from wide areas).
- Contingency Scenario 2: Early Blitz & Chill
- Trigger Condition: Mito capitalize on an early defensive turnover to score inside the first 20 minutes.
- Tactical Deviation: Urawa are forced to abandon structural caution immediately, turning the contest into a chaotic, end-to-end transitional shootout.
- Corner Volume Alert: Moderate (8.5–10.5 corners).
🚩 4.6 Set-Piece Battle Preview
- Dead-Ball Threat Level: Moderate
- Tactical Breakdown: Mito Hollyhock possess solid aerial profiles through centre-backs Rei Ieizumi and Kenta Itakura, capable of attacking inswinging deliveries from corner routines. Urawa counter with aerial size in their backline, yet their zonal marking has shown intermittent lapses during second-phase clearances. Neither side holds a decisive dead-ball mismatch, keeping set-piece goal probability at standard baseline levels.
🚩 4.7 Corner & Dead-Ball Dynamics Preview
- Corner Volume Expectation: Neutral (8.5–10.5)
- Tactical Rationale: Mito's direct attacking methodology relies on vertical line-breaking passes rather than sustained wing overlaps and crossing volume, generating a modest 4.7 corners won per game. Urawa average 4.2 corners per match away from home due to central buildup through Gustafson. Combined corner expectancy projects squarely within the neutral 8.5 to 10.5 band.
💬 Reader Engagement & Tactical Debate
Can Cho Kwi-jae successfully rebalance Urawa's defensive transition structure away from home, or will Mito Hollyhock's rapid vertical counter-press exploit the Reds' structural flaws at K's denki Stadium? Share your tactical predictions and scoreline projections below.
❓ Frequently Asked Questions (FAQ)
Q1: What is the most probable outcome for Mito Hollyhock vs Urawa?
A: The most probable outcome is Mito Hollyhock avoiding defeat via Home Win / Draw, with the primary model branch pointing toward an outright 2:1 home victory. Mito's vertical counter-attacking pace directly exposes Urawa's away defensive record of conceding 3.0 goals per fixture.
Q2: What are the primary projected scoreline and total goals outlook?
A: The primary projected scoreline is 2:1 (9.9% model density), supported by a secondary projection of 1:1 (9.2%). The total goals outlook is firmly oriented toward Over 2.5, driven by an expansive combined lambda expectancy of 3.20.
Q3: What is the single biggest tactical x-factor or lineup absence in this match?
A: The decisive tactical x-factor is Urawa's defensive transition vulnerability when full-back Miki Yamane pushes high into attack. With both squads enjoying completely clean injury sheets, Mito's ability to spring Arata Watanabe into the vacated wide channels will define the match.
Q4: How do the advanced metrics (xG and form) compare to the market price?
A: Public market pricing skews heavily toward Urawa based on club stature, assigning the visitors an implied win probability near 45%. In contrast, underlying metrics and Poisson modeling project Mito with a 62.5% home win density, creating exceptional analytical value on the host side.
Key Players to Watch

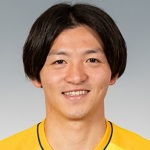





Mito Hollyhock

Urawa
More J1 League Matches & Intelligence
 Kashima

 Cerezo Osaka

 Sanfrecce Hiroshima

 Tokyo Verdy

Mito Hollyhock Past Reports Recent Settled Archive
Urawa Past Reports Recent Settled Archive
This report was generated by an AI model before kickoff using the data package available at publication time. It is preserved unchanged after settlement as a permanent archive. Model outputs are statistical estimates, not guarantees.