
Kashima vs Yokohama F. Marinos Tactical Breakdown & Probabilistic Modeling: Aggregate Edge vs Cup Urgency
- ▸Home Win / Draw anchored by Kashima's 39.4% Poisson win baseline, 63.1 FW-OTI edge, and aggregate cushion against a Marinos side missing suspended Ryo Miyaichi (Confidence: Moderate, Value: Moderate)
- ▸Under 2.5 Goals backed by a 2.25 combined goal expectancy (60.9% Poisson probability for two goals or fewer) and cautious first-half cup tempo (Confidence: Moderate, Value: Moderate)
- ▸Late open-play transition surge if Marinos strikes first before halftime and forces Kashima out of its mid-block (Confidence: Low, Value: Low)
Matchup Intelligence & Head-to-Head
Season Benchmarks & H2HKashima Attack vs Defence Yokohama F. Marinos
Recent Head-to-Head Meetings
At the heart of this contest lies a sharp tactical contrast between aggregate management and knockout desperation as Kashima hosts Yokohama F. Marinos at Mercari Stadium in the second leg of the 2026 J-League Cup Quarter-finals. Holding a 3-2 advantage from Wednesday's dramatic first-leg comeback at Nissan Stadium, Toru Oniki's side enters Sunday's decider needing only to avoid defeat to reach the semi-finals. Conversely, Steve Corica's visitors must attack on the road despite losing goalscorer Ryo Miyaichi to suspension and conceding goals at an alarming recent rate. With underlying expected-goals feeds unaligned for this competition and no market pricing snapshot available, XG Mind AI deconstructs the matchup through per-match scoring rates, independent Poisson goal distributions, advanced player threat indices, and verified personnel updates to map the most probable 90-minute scripts.
📌 Kashima vs Yokohama F. Marinos: Match Intelligence Brief
- Fixture ID: 1648036
- Matchup: Kashima vs Yokohama F. Marinos
- Competition: J-League Cup, Quarter-finals (2nd Leg; Kashima leads 3-2 on aggregate)
- Kickoff Time: 2026-11-15 06:00 UTC
- Key Tactical Watchpoint: Whether Kashima's forward depth can punish a stretched, Miyaichi-less Yokohama F. Marinos side without Yuta Higuchi controlling midfield tempo.
📊 1. Kashima Attacking Structure vs Yokohama F. Marinos Defensive Counter
⚔️ Head-to-Head History: Kashima Unbeaten in Five Straight Competitive Clashes
| Date | Competition | Home Team | Score (HT) | Away Team |
| 2026-11-11 | J-League Cup | Yokohama F. Marinos | 2:3 (2:1) | Kashima |
| 2026-08-07 | J1 League | Yokohama F. Marinos | 3:4 (2:1) | Kashima |
| 2026-05-10 | J1 League | Yokohama F. Marinos | 1:1 (0:0) | Kashima |
| 2026-02-14 | J1 League | Kashima | 1:0 (0:0) | Yokohama F. Marinos |
| 2025-12-06 | J1 League | Kashima | 2:1 (1:0) | Yokohama F. Marinos |
📈 Team Form & Tactical Style Breakdown: Controlled Verticality vs Fragile Transition Aggression
Home Team (Kashima): Under long-serving head coach Toru Oniki (652 days in charge), Kashima brings a balanced tactical profile backed by a 63.4 time-decayed recent form score across its last five all-competition fixtures (WLDWW). In that stretch, Kashima alternated between sharp home attacking displays—defeating Pohang Steelers 3:0 in AFC Champions League Elite play on October 28 and hammering Cerezo Osaka 4:1 in J1 League action on October 31—and disciplined away resilience, drawing 0:0 at Buriram United on November 4 before falling 0:2 at FC Tokyo on November 7. Crucially, Kashima overturned a 2:0 deficit to defeat Yokohama F. Marinos 3:2 in the November 11 first leg through a Yuma Suzuki brace (45', 82') and a Gaku Shibasaki strike (65'). Kashima's offensive edge centers on a 63.1 Forward Threat Index (FW-OTI), anchored by Aleksandar Čavrić (78.2 OTI, 7.3 form rating), Léo Ceará (70.4 OTI, 90.7 overall score), and Élber (66.2 OTI). Across its recent five-match window, Kashima has averaged 1.86 decayed goals scored and 1.23 decayed goals conceded while recording five set-piece goals in the supplied tactical profile, giving Oniki's side multiple avenues to hurt an advancing opponent even while sitting on a one-goal aggregate cushion.
Away Team (Yokohama F. Marinos): Managed by Steve Corica (106 days in charge), Yokohama F. Marinos enters this second leg with a 46.0 recent form score (LDWWD) that reflects extreme volatility at both ends of the pitch. Across its last five outings, Marinos has averaged an impressive 2.32 decayed goals scored—highlighted by a 4:3 cup victory over Sanfrecce Hiroshima on October 28 and a 4:2 J1 League triumph against Kawasaki Frontale on November 1—yet conceded 2.09 decayed goals per match without keeping a single clean sheet. Even in home draws against Nagoya Grampus (1:1 on October 25) and Fagiano Okayama (1:1 on November 7), Marinos struggled to close games cleanly, a flaw brutally exposed when a 2:0 lead unraveled into a 2:3 defeat against Kashima on November 11. Marinos relies heavily on midfield runner Takuto Kondo (59.8 OTI, 66.0 DII, 7.0 form rating), winger Kaina Matsumura (53.5 OTI), and center-back Jeisson Quiñónes (79.7 overall score, 65.0 GIM) to sustain build-up and transitional balance, while striker Kaina Tanimura (49.5 OTI) leads the line. With an away attacking OTI average of just 45.6 and a vital wide contributor suspended, Corica's team faces a delicate tactical test: pushing numbers forward to erase the deficit without exposing Quiñónes and Kosei Suwama to Kashima's vertical counters.
🔍 Core Statistical Comparison: Narrow Baseline Goal Gap Masks Recent Defensive Divergence
(Note: Season expected-goals feeds are unaligned across teams in the supplied data package, and team possession, shot, and corner averages are not supplied; attacking and defensive baselines below use supplied per-match goal rates.)
| Metric | Kashima (Season) | Yokohama F. Marinos (Season) |
| Expected Goals (xG / match) | N/A (unaligned; 1.20 goals/match) | N/A (unaligned; 1.10 goals/match) |
| Expected Goals Against (xGA / match) | N/A (unaligned; 1.00 GA/match) | N/A (unaligned; 1.20 GA/match) |
| Average Possession (%) | N/A (not supplied) | N/A (not supplied) |
| Shots / match | N/A (not supplied) | N/A (not supplied) |
| Shots on Target / match | N/A (not supplied) | N/A (not supplied) |
| Corners Won / match | N/A (not supplied) | N/A (not supplied) |
⚠️ Key Absences & Squad Impact Assessment: Ryo Miyaichi Suspended, Yuta Higuchi Fractured Fibula
- Ryo Miyaichi (Yokohama F. Marinos — Red Card Suspension, Confirmed Out): Per the official J.League disciplinary announcement published on November 12, 2026, Miyaichi received a two-match cup suspension following his first-leg dismissal against Kashima and is ruled out of Sunday's quarter-final second leg. Having scored Marinos' second goal in the 25th minute of Leg 1, his absence strips Corica of direct pace and finishing punch on the flank.
- Yuta Higuchi (Kashima — Fractured Right Fibula, Confirmed Out): Per Kashima Antlers' official club medical announcement on November 12, 2026, midfielder Higuchi sustained a fractured right fibula in the November 7 league match against FC Tokyo. Removing Higuchi (46.0 OTI, 58.0 DII) reduces Kashima's central ball-progression and pressing coverage, placing heavier minutes on Matheus Bueno (who carries a Medium fatigue-risk flag) and Gaku Shibasaki.
- Tae-Hyeon Kim (Kashima — Injury, Doubtful): Listed as Doubtful in the supplied match feed. If he misses out, Kashima loses an established center-back option alongside Naomichi Ueda and Kaito Chida; if he returns, he reinforces aerial and box protection against Marinos' desperate second-half pressure.
- Additional Unverified Matchday Statuses: Earlier J.League injury notices—covering Yokohama F. Marinos' Jordy Croux (hamstring strain, November 1) and Kei Chinen (right Lisfranc injury, October 21), as well as Kashima's Koki Anzai (left knee ACL injury, July 18)—remain unverified for tonight's matchday squad and are treated cautiously rather than assumed as confirmed changes beyond the verified November 12 rulings.
🔬 Advanced Metrics Comparison: Kashima Holds Marked Forward Threat Advantage
| Tactical Dimension | Kashima | Yokohama F. Marinos | Comparative Edge |
| Forward Threat Index (FW-OTI) | 63.1 | 45.6 | Kashima (+17.5 index edge; deeper front-line threat) |
| Defensive Involvement (DF-DII) | 35.9 | 49.1 | Marinos records higher defensive-action volume |
| Defensive Quality (Goals Conceded / match) | 1.00 GA/match (xGA N/A) | 1.20 GA/match (xGA N/A) | Kashima (tighter baseline & 1.23 vs 2.09 decayed GA) |
| Midfield Playmaking (MF-OTI) | 48.3 | 42.4 | Kashima (+5.9 midfield offensive index edge) |
| Key Player Influence (Top GIM) | 70.5 (Léo Ceará) | 65.0 (Jeisson Quiñónes) | Kashima's highest-impact hub is an attacker |
| Adjusted Squad Form Rating | 6.9 (0–10 scale) | 6.8 (0–10 scale) | Marginal Kashima edge among available regulars |
| Clean Sheet Frequency (%) | N/A (not supplied) | N/A (not supplied) | Context: Kashima 2 clean sheets in last 5; Marinos 0 |
| Big Chance Waste Rate (%) | N/A (not supplied) | N/A (not supplied) | Context: Kashima 5 set-piece goals vs Marinos 3 |
Penetration & Matchup Analysis:
Kashima's attacking group—led by Aleksandar Čavrić (78.2 OTI), Léo Ceará (70.4 OTI), and Élber (66.2 OTI)—is built to attack open transition lanes rather than break down ten-man low blocks. Because Yokohama F. Marinos trails 3-2 on aggregate and has conceded at least twice in four of its last five matches (2.09 decayed goals against per game), Corica's defenders cannot simply sit deep at Mercari Stadium. While Marinos' 49.1 DF-DII indicates active defensive work from Takuto Kondo (66.0 DII) and Taisei Inoue (49.3 DII), high defensive-action volume paired with zero clean sheets in five games points to an exposed back line rather than stable prevention.
⚖️ Referee & Officiating Analysis: Match Official Pending Confirmation
- Match Official: To be announced (typically confirmed 60–90 minutes prior to kickoff).
- Officiating Tendency: Disciplinary tendencies cannot be profiled before the referee assignment is published; however, the November 11 first leg produced a penalty, multiple cautions, and a straight red card for Ryo Miyaichi.
- Tactical Repercussions: With Marinos needing to press aggressively to overturn a one-goal deficit and Kashima defending a narrow aggregate lead without Yuta Higuchi, tactical fouls in midfield transitions and penalty-box duels carry elevated disruption risk regardless of who holds the whistle.
🤔 2. Can Yokohama F. Marinos Disrupt Kashima? Dual Perspective
🟢 Arguments Supporting Kashima
- Superior Forward Quality Meets Porous Road Defense: Kashima's 63.1 FW-OTI towers over Marinos' 45.6, and Oniki's forwards already put four goals past Marinos in August (4:3) and three past them four days ago (3:2) against a defense allowing 2.09 decayed goals per match.
- Head-to-Head Hegemony & Home Pitch Advantage: Kashima is unbeaten across its last five competitive meetings against Marinos (four wins, one draw), including consecutive home J1 League victories at Mercari Stadium (2:1 in December 2025 and 1:0 in February 2026) where it controlled key game states.
- Knockout Leverage & Opponent Discipline Hit: Leading 3-2 on aggregate removes any obligation for Kashima to force risky attacks early, while Marinos arrives without suspended first-leg goalscorer Ryo Miyaichi, reducing the visitors' counter-attacking punch.
🔴 Arguments Opposing Kashima / Supporting Yokohama F. Marinos
- Central Midfield & Defensive Attrition: Confirming Yuta Higuchi out with a fractured fibula and carrying Tae-Hyeon Kim as doubtful thins Kashima's ball-winning and center-back depth, while Matheus Bueno carries a Medium fatigue flag.
- Recent Workload & Cold Attacking Outings: Kashima has played three matches in the past 14 days—including an AFC Champions League Elite trip to Buriram (0:0) and a 0:2 league loss at FC Tokyo—showing it can be shut out when rotated or stretched.
- Marinos' High-Output Urgency: Despite defensive leaks, Corica's side owns a 2.32 decayed goals-for average across its last five games and opened a 2:0 lead within 25 minutes of Leg 1, proving it can trouble Kashima's back line if given early momentum.
Contextual & Motivational Risk Assessment
As a single-elimination second leg, incentives are unusually asymmetric: Kashima advances with either a home victory or any draw, whereas Yokohama F. Marinos must win in 90 minutes just to keep its semi-final hopes alive. Both teams enter on identical 92-hour (3.8-day) rest cycles after Wednesday's first leg, neutralizing raw recovery disparity, though Kashima carries one extra match in the prior 14-day window (three versus two). That aggregate cushion makes game-state management decisive: if Kashima stays level into the final 20 minutes, Oniki has every incentive to protect structure rather than chase a multi-goal margin.
🧠 3. Algorithmic Modeling for Kashima vs Yokohama F. Marinos
- Analytical Modeling Deployed: Independent Poisson Expected-Goal Matrix (calibrated from supplied goal-based lambdas) cross-checked against time-decayed form indices and squad OTI/GIM availability adjustments.
- Model Quantitative Insights: Using the supplied goal-based expectancy anchors (Kashima lambda 1.20, Yokohama F. Marinos lambda 1.05, combined lambda total 2.25, lambda difference 0.15), the independent Poisson baseline distributes outcomes across 39.4% Home Win, 28.6% Draw, and 31.9% Away Win. Total-goal density concentrates heavily beneath the 2.5 line—at 60.9% for two goals or fewer (10.5% for 0, 23.7% for 1, 26.7% for 2) versus 39.1% for three or more—with 1:1 (13.3%) and 1:0 (12.6%) standing as the top two single scorelines ahead of 0:1 (11.1%), 0:0 (10.5%), and 2:1 (8.0%). Both-teams-to-score leans slightly toward "No" at 54.6% versus 45.4% "Yes."
- Market Sentiment & Professional Consensus: No 1X2 market odds, totals pricing, or exchange liquidity feed was supplied in this fixture's data package; consequently, no market-consensus bias or sharp-money divergence can be claimed, and the assessment rests solely on fundamental metrics, Poisson baselines, and verified squad news.
- Dynamic Line & Price Movement: Because opening and current market snapshots are absent from the package, no line or price movement is interpreted or inferred.
🎯 4. Scenario Mapping: How the 90 Minutes Will Unfold
🧭 Upset Risk Assessment: Kashima's advantage tonight rests on superior forward quality (63.1 FW-OTI led by Aleksandar Čavrić and Léo Ceará), four wins and a draw in its last five meetings with Yokohama F. Marinos, and a 3-2 aggregate lead reinforced by Ryo Miyaichi's confirmed suspension for the visitors. However, Kashima enters with Yuta Higuchi confirmed out with a fractured fibula, Tae-Hyeon Kim listed as doubtful, and three matches played in 14 days, while Marinos averages 2.32 decayed goals scored across its last five games and must attack from the outset. Marinos' most plausible route to avoid defeat is pressing early to exploit Kashima's thinned midfield and force a scoring draw or narrow stalemate, though its own 2.09 decayed goals-conceded rate limits an outright away victory. Overall, Kashima's edge holds, but aggregate incentives require covering the draw alongside a home win, with official starting lineups and the late referee appointment remaining the key unverified variables.
Final Strategic Synthesis
Reconciling the narrow baseline lambda margin (1.20 versus 1.05) with recent form and verified November 12 personnel updates points away from blind backing of a runaway home win and toward controlled two-way protection on the host. Kashima possesses the healthier forward group, better defensive structure (1.00 baseline GA/match versus Marinos' 1.20, and 1.23 versus 2.09 decayed GA), and complete tactical leverage from the 3-2 first-leg win. Yet Higuchi's confirmed absence, Kim's doubtful status, and the mathematical reality that a 90-minute draw sends Kashima through make Home Win / Draw the soundest expression of how the match is likely to play out.
- ⭐⭐ AI Confidence Rating: Moderate
"⚠️ Rotational risk or key personnel uncertainty detected; rating has been adjusted downward accordingly."
🔑 4.1 Core Analytical Viewpoints
Strategic Opening Context: With aggregate mathematics allowing Kashima to manage tempo while a depleted Yokohama F. Marinos chases the tie, MatchMind AI identifies the controlled home-unbeaten corridor below as the most balanced probabilistic trajectory for this encounter. All projections represent statistical estimates for research purposes, and readers are encouraged to evaluate tactical context independently.
- Primary Thesis (Core): Home Win / Draw — Kashima leads on forward threat, home H2H dominance, and Marinos' confirmed loss of suspended Ryo Miyaichi, while the 3-2 aggregate cushion and Yuta Higuchi's absence make a tactical draw a natural secondary outcome (Confidence: Moderate, Value Index: Moderate)
- Secondary Angle (Value): Under 2.5 Goals — Supported by the 2.25 combined lambda baseline (60.9% Poisson probability for two goals or fewer) and Kashima's incentive to compress space once ahead on aggregate (Confidence: Moderate, Value Index: Moderate)
- Contingency Angle (Hedge / Upset): Late transition acceleration if Marinos strikes first and forces Kashima out of its compact mid-block, reopening a 2:1 or higher-scoring path (Confidence: Low, Value Index: Low)
Strategic Summary: Pairing Home Win (39.4% Poisson baseline, boosted by Miyaichi's suspension and Kashima's 63.1 FW-OTI) with Draw (28.6% Poisson baseline, amplified by second-leg aggregate math and Higuchi's injury) captures both of Kashima's primary qualifying scripts without forcing an unsustainable goal-fest projection.
Core Recommendation: Back Kashima to avoid defeat (Home Win / Draw) in a controlled quarter-final second leg where Home Win leads and Under 2.5 remains favored.
🔥 4.2 Total Goals & Over/Under 2.5 Projection
1️⃣ Primary Goal Count: 2 Goals (Model Probability: 27%)
- Tactical Deduction: In the baseline Poisson distribution (lambda 1.20 vs 1.05), two exact goals stands as the single highest-density outcome at 26.7%, comfortably ahead of three goals (20.0%) and four goals (11.3%). Tactically, two goals fits both main knockout trajectories at Mercari Stadium: either a cagey 1:1 stalemate in which Yokohama F. Marinos finds one breakthrough before Kashima closes down the final third to preserve its 4-3 aggregate lead, or a clinical 2:0 home victory where Kashima scores once in control and adds a second on a late counter-attack as Marinos commits defenders forward.
2️⃣ Secondary Goal Count: 1 Goal (Model Probability: 24%)
- Tactical Deduction: One exact goal represents the second-highest Poisson probability at 23.7% and reflects the attrition script seen when these sides met at Mercari Stadium in February 2026 (1:0 to Kashima). With Ryo Miyaichi suspended and Kashima missing Yuta Higuchi's vertical midfield passing, the opening hour may feature cautious spacing and limited clear-cut box entries. Under that tight rhythm, a single decisive set-piece or penalty-box moment—similar to Kashima's five recent set-piece strikes—could settle the 90 minutes 1:0 without prompting an open shootout.
3️⃣ Over / Under 2.5 Quantitative Deduction: Under 2.5 (Model Supported)
- Tactical & Liquidity Rationale: Without a supplied market totals line to cross-check, the Under 2.5 projection derives directly from the 2.25 combined lambda baseline, which assigns 60.9% probability to two goals or fewer versus 39.1% to three or more, alongside a 54.6% Poisson probability that at least one team fails to score. While both sides produced a 3:2 thriller four days ago, that scoreline was heavily shaped by a 20th-minute penalty and Miyaichi's subsequent red card forcing ten-man chaos. Tonight's personnel reality—Miyaichi suspended for Marinos and Higuchi sidelined for Kashima—combined with Kashima's incentive to protect its aggregate lead at home favors a tighter, lower-event tempo than the first leg.
🥅 4.3 Final Scoreline Probability Matrix
1️⃣ Primary Projected Scoreline: 1:0 (Model Density: 12.6%)
- Matrix Reasoning: Although 1:1 edges 1:0 slightly in raw unweighted Poisson density (13.3% vs 12.6%), 1:0 is promoted to the primary scoreline once verified team news and venue dynamics are applied. Yokohama F. Marinos loses suspended winger Ryo Miyaichi—one of its chief transitional threats in Leg 1—while Kashima has already demonstrated at Mercari Stadium (1:0 vs Marinos in February 2026; 3:0 vs Pohang Steelers in October) that it can lock down home territory. A single clinical finish from Léo Ceará or Aleksandar Čavrić against a side conceding 2.09 decayed goals per match puts Kashima two goals clear on aggregate and allows Oniki to see out the tie cleanly.
2️⃣ Secondary Projected Scoreline: 1:1 (Model Density: 13.3%)
- Matrix Reasoning: Holding the highest raw Poisson probability at 13.3%, a 1:1 draw captures the core counter-risk created by Yuta Higuchi's confirmed absence and Tae-Hyeon Kim's doubtful fitness status. Because Yokohama F. Marinos has scored in five consecutive matches (2.32 decayed goals per game) and must take attacking risks to erase its first-leg deficit, Steve Corica's side retains enough forward persistence via Kaina Tanimura and Takuto Kondo to score once. Even if Marinos levels at 1:1, Kashima's 3-2 first-leg lead removes any urgency for Oniki to chase a late winner, making a controlled 1:1 stalemate highly plausible.
⏳ 4.4 Half-Time / Full-Time Trend Probabilities
1️⃣ Primary Trend: Draw-Win (Model Probability: 24%)
- Script Reasoning: Cup scoring splits point strongly toward a cagey first half: Kashima posted a 0.333 first-half goal share in its opening cup tie while Marinos recorded a 0.30 first-half goal share across four cup matches, drawing level at half-time in half of those outings. Historically, three of the last four J1 League head-to-heads (including February's 1:0 and May's 1:1) were also 0:0 at the interval. Expect Kashima to prioritize compact spacing early before exploiting Marinos' second-half fatigue and defensive gaps for a decisive 1:0 breakthrough after the break.
2️⃣ Secondary Trend: Draw-Draw (Model Probability: 19%)
- Script Reasoning: If the opening 45 minutes remain deadlocked and Yokohama F. Marinos' pressing disrupts Kashima's Higuchi-less midfield build-up, the second half can settle into a mutually cautious 0:0 or a traded 1:1 exchange that preserves Kashima's aggregate lead. Because Kashima only needs to avoid defeat to advance and Marinos has shown difficulty sustaining clean defensive structure over 90 minutes without overcommitting, Draw-Draw captures the exact second-half stalemate branch behind the 1:1 secondary scoreline.
⏳ 4.5 Match Progression & Live Tactical Scripts
- Attacking & Defensive Tempo Fingerprint:
- Kashima Attacking Profile: Type B (Late Accelerators) — Kashima's cup first-half goal share stands at 0.333, and in Leg 1 it scored twice in the second half (65', 82') after trailing early, preferring measured first-half probing before striking as opponents tire.
- Yokohama F. Marinos Defensive Vulnerability: Type E (Mid-Match & Second-Half Vulnerability) — Marinos has conceded 70% of its cup goals after half-time and collapsed from 2:0 up to lose 2:3 in Leg 1, reflecting structural fragility once midfield spacing stretches.
Part 1: Base Case Match Flow (Standard Trajectory)
- 0–30 Minutes: Kashima settles into a balanced mid-block to protect its 3-2 aggregate lead, letting Marinos circulate the ball into wide zones where Miyaichi's suspension dulls penetration.
- 30–60 Minutes: Corica pushes Takuto Kondo and full-backs higher as time pressure builds, creating transitional space for Aleksandar Čavrić and Léo Ceará to test Jeisson Quiñónes and Kosei Suwama.
- 60–90 Minutes: Substitutions and fatigue widen the pitch; Kashima either strikes on a vertical transition for 1:0 or absorbs a single Marinos equalizer while managing the clock to advance at 1:1.
- 📊 Baseline Projections:
- Goal Expectancy Flow: Roughly 30–35% of scoring expectancy before half-time and 65–70% in the second half as aggregate urgency forces Marinos open.
- Corner Trajectory: Gradual second-half rise driven by Marinos' territorial chasing against a compact Kashima penalty box.
Part 2: Tactical Contingency Plans (Strategic Deviations)
- Contingency Scenario 1: Frustrated Favorite
- Trigger Condition: Scoreless at 65' despite Kashima controlling clear transition openings, with Marinos still needing just one goal to level the tie on aggregate.
- Tactical Deviation: Kashima drops deeper into a back-five protective shell around Naomichi Ueda and Kaito Chida, turning the final 25 minutes into pure box defense and direct clearances.
- Corner Volume Alert: High.
- Contingency Scenario 2: Upset Signal
- Trigger Condition: Yokohama F. Marinos scores an early opening goal inside 25 minutes, erasing Kashima's aggregate cushion before halftime.
- Tactical Deviation: Toru Oniki is forced out of conservative management to push Matheus Bueno and Gaku Shibasaki higher, accelerating tempo toward an open 2:1 or 1:1 exchange.
- Corner Volume Alert: Moderate.
🚩 4.6 Set-Piece Battle Preview
- Dead-Ball Threat Level: Moderate
- Tactical Breakdown: With supplied tactical fingerprints crediting Kashima with five set-piece goals compared to three for Yokohama F. Marinos, dead-ball delivery from Gaku Shibasaki and aerial targets like Naomichi Ueda give the hosts a quiet tie-breaking edge if open-play build-up stalls without Yuta Higuchi. Tae-Hyeon Kim's doubtful status makes Kashima's own zonal and man-marking coordination on Marinos corners worth watching if he sits out.
🚩 4.7 Corner & Dead-Ball Dynamics Preview
- Corner Volume Expectation: Neutral (8.5–10.5)
- Tactical Rationale: Season corner averages are not supplied in the match package, keeping this projection qualitative. A cautious first half with Kashima protecting an aggregate lead should limit early corner surges, while Marinos' second-half urgency without suspended winger Ryo Miyaichi will funnel play toward blocked central shots and late wide crosses, pointing toward a neutral overall count.
💬 Reader Engagement & Tactical Debate
With Yuta Higuchi sidelined by a fractured fibula and Tae-Hyeon Kim doubtful, can Toru Oniki's midfield still control the second-half tempo against a desperate Yokohama F. Marinos side, or does Ryo Miyaichi's suspension leave Steve Corica short of the wide thrust needed to crack Kashima at Mercari Stadium?
❓ Frequently Asked Questions (FAQ)
Q1: What is the most probable outcome for Kashima vs Yokohama F. Marinos?
A: Kashima avoiding defeat (Home Win / Draw) is the primary projection, with a Home Win leading at a 39.4% Poisson baseline alongside a 28.6% Draw probability. Kashima holds a 3-2 aggregate lead, boasts a 63.1 versus 45.6 Forward Threat Index edge, and faces a Marinos side missing suspended goalscorer Ryo Miyaichi.
Q2: What are the primary projected scoreline and total goals outlook?
A: The primary projected scoreline is 1:0 (12.6% Poisson density), backed by a secondary 1:1 draw projection (13.3% raw Poisson density), aligning with Under 2.5 total goals. Exact totals center on 2 Goals (26.7%) and 1 Goal (23.7%), reflecting the 2.25 combined lambda expectancy and Kashima's aggregate-management incentives.
Q3: What is the single biggest tactical x-factor or lineup absence in this match?
A: The contrasting November 12 absences of Yokohama F. Marinos winger Ryo Miyaichi (suspended two cup matches after his Leg 1 red card) and Kashima midfielder Yuta Higuchi (fractured right fibula) represent the decisive personnel shifts. Miyaichi's ban blunts Marinos' comeback threat, while Higuchi's injury tests Kashima's central control and pushes the confidence rating to Moderate.
Q4: How do the advanced metrics and recent form compare to the market price?
A: No 1X2 market odds or totals liquidity feed was supplied for this fixture, so no price comparison or market-value divergence can be evaluated. On pure pitch metrics, Kashima's 63.4 recent form score, 63.1 FW-OTI, and 1.23 decayed goals conceded per match compare favorably against Marinos' 46.0 form score and 2.09 decayed goals conceded per game.
Key Players to Watch
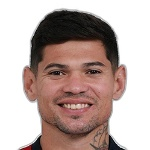 FW
 FW
 MF
 DF
 MF
 FW

Kashima

Yokohama F. Marinos
More J-League Cup Matches
 Cerezo Osaka

 Kashiwa Reysol

 Machida Zelvia
 Urawa
Kashima Past Reports Recent Settled
Yokohama F. Marinos Past Reports Recent Settled
This report was generated by an AI model before kickoff using the data package available at publication time. It is preserved unchanged after settlement as a permanent archive. Model outputs are statistical estimates, not guarantees.